


Old Bread Box to Fabulous Charging Station
 Good Morning Everyone!
It’s Kathleen and I’m here to show you how you can take an ordinary old breadbox from the thrift store and turn it into an amazing charging station for your electronics.
You probably have a cell phone, maybe a tablet, or even an MP3 player that are always in need of charging. If you’re anything like me, the cords drive you nuts. Yes? I know, right?! They drive me crazy and I couldn’t really find any charging stations that fit into my decor. While out thrifting one day, I came across an old breadbox and it was the perfect candidate for a charging station.
Update October 2020: The products used in this tutorial are First Generation IOD, which means they’ve been discontinued. You can join our IOD First Gen Pop Up group on Facebook to try to purchase. Or, you can make something very similar using current products. Reach out to an approved IOD stockist and they will be able to suggest current moulds to make this project.
Click here to use our store locator to find a brick and mortar store near you or you can click here to find an online shop.
Want to make one too? This is what you’re going to need:
thrifted breadbox
First Gen IOD Moulds
IOD Air Dry Clay
Wood Glue
Chalky Type Paint in your choice of color
Printable Graphics (I used Graphics Fairy)
Mod Podge
Paint Brushes
Old Damp Rag
Clear Wax
Dark Wax
Drill
5/8 inch Paddle Drill Bit
Spray Bottle of Vinegar/Water Solution and Paper Towels
Okay, lets get started!
The first thing you want to do is clean up your breadbox. Mine was dusty and dirty and needed a really good cleaning. I have a spray bottle filled with a vinegar/water solution that I always use for this. Just spray it on your paper towel and wipe away. Once dry and clean, you’re ready to go.

Okay, now this is where the fun begins. We’re going to make moulds out of paper clay to dress up our breadbox. I have used the IOD Vintage Art Decor Moulds in Baroque 3 and Baroque 6. All you do is press a small amount of IOD paper clay into the mould and spread it out with your finger. Once it’s all pressed in and you’ve filled out the mould, smooth it out with your finger.

Take your casting out of the mould and glue it on your breadbox. I glue it on right away before the clay dries. Paper clay naturally shrinks a bit and may bend as it dries and this is why I glue it on now. It will dry nice and straight for you, plus, if you need to bend your casting to fit a curve, doing it before the clay dries is the way to go!

We’re going to set the breadbox aside for a bit and let the clay dry. In the meantime, head on over to The Graphics Fairy and select an image that you like for the front of your box. I chose the “Grand Bazar” graphic. Print it out to fit your breadbox, but make sure that if there are any letters or numbers on your image, that you print it in reverse or “mirror” image. Now cut out your image getting as close to the design as you can without actually cutting into your design. You can see what I mean in the photo above. Set your image aside, we’ll be using it after we’ve painted the breadbox.
After a few hours, your moulds will be dry enough to start painting your piece. I painted mine white and used Waverly Inspirations brand chalk-y paint in “White” #60699E. Paint the entire breadbox inside and out. I used two coats of paint. Once dry, we’re going to apply the Graphics Fairy image. For this, you want to take your paint brush and coat the inked side of your image with Mod Podge, remembering to make sure your graphic is printed in mirror image if there are any words or numbers on it. Immediately place your graphic, Mod Podge side down onto your breadbox. Smooth it out to remove any air bubbles or wrinkles and let it dry completely. I would wait at least 8 hours to overnight. Once dry, take your damp rag and dampen the paper on your image. Gently rub your finger over the paper until the paper starts to roll off under your finger. Wipe away the peeling paper with your rag, dampening and rubbing as you go. Once your paper has been removed, your image will be left behind. Be patient with this part and work slowly. You don’t want to remove your image – only the paper. This part is tedious, but totally worth it. You want to hear some good news though? As soon as the IOD Decor Transfers become available, you won’t need to do any of this step because those amazing sisters have made it super easy. You will be able to achieve this same type of look with their gorgeous Decor Transfers – yay!!
Okay, so now your moulds are on, your box is painted, and your image is in place. Now, we’re going to apply a coat of clear wax to the whole piece. I used Annie Sloan here, but you can use what you have. Immediately after the clear wax, I applied dark was to all the moulds.

Take an old rag (I cut up an old t-shirt) and wipe away the excess, leaving dark wax in all the detailed areas.

You can stop here with the wax if you like, but if you want an overall distressed, antiqued look, apply dark wax to the whole box. Work in small sections, applying and wiping away as you go.


When I bought the breadbox, it already had a wooden knob on it. Originally, my plan was to replace that with a pretty mercury glass knob but in the end, I painted the original knob with Annie Sloan Chalk Paint in “Graphite.” I liked the look of the painted knob much better.

Okay, the box is almost finished. The last thing we need now, are holes in the back so we can feed the charging cords through them. The ends of my cords are all different sizes, but the one thing they all have in common are USB connections on at least one end.

For this reason, I used a 5/8 inch paddle bit to make a hole that will accommodate all of my cords.

I was able to fit 4 equally spaced holes into my box. Yours may be different, depending on the size of your box.

Thread the cords through. If one end is too big, thread the USB end in first.
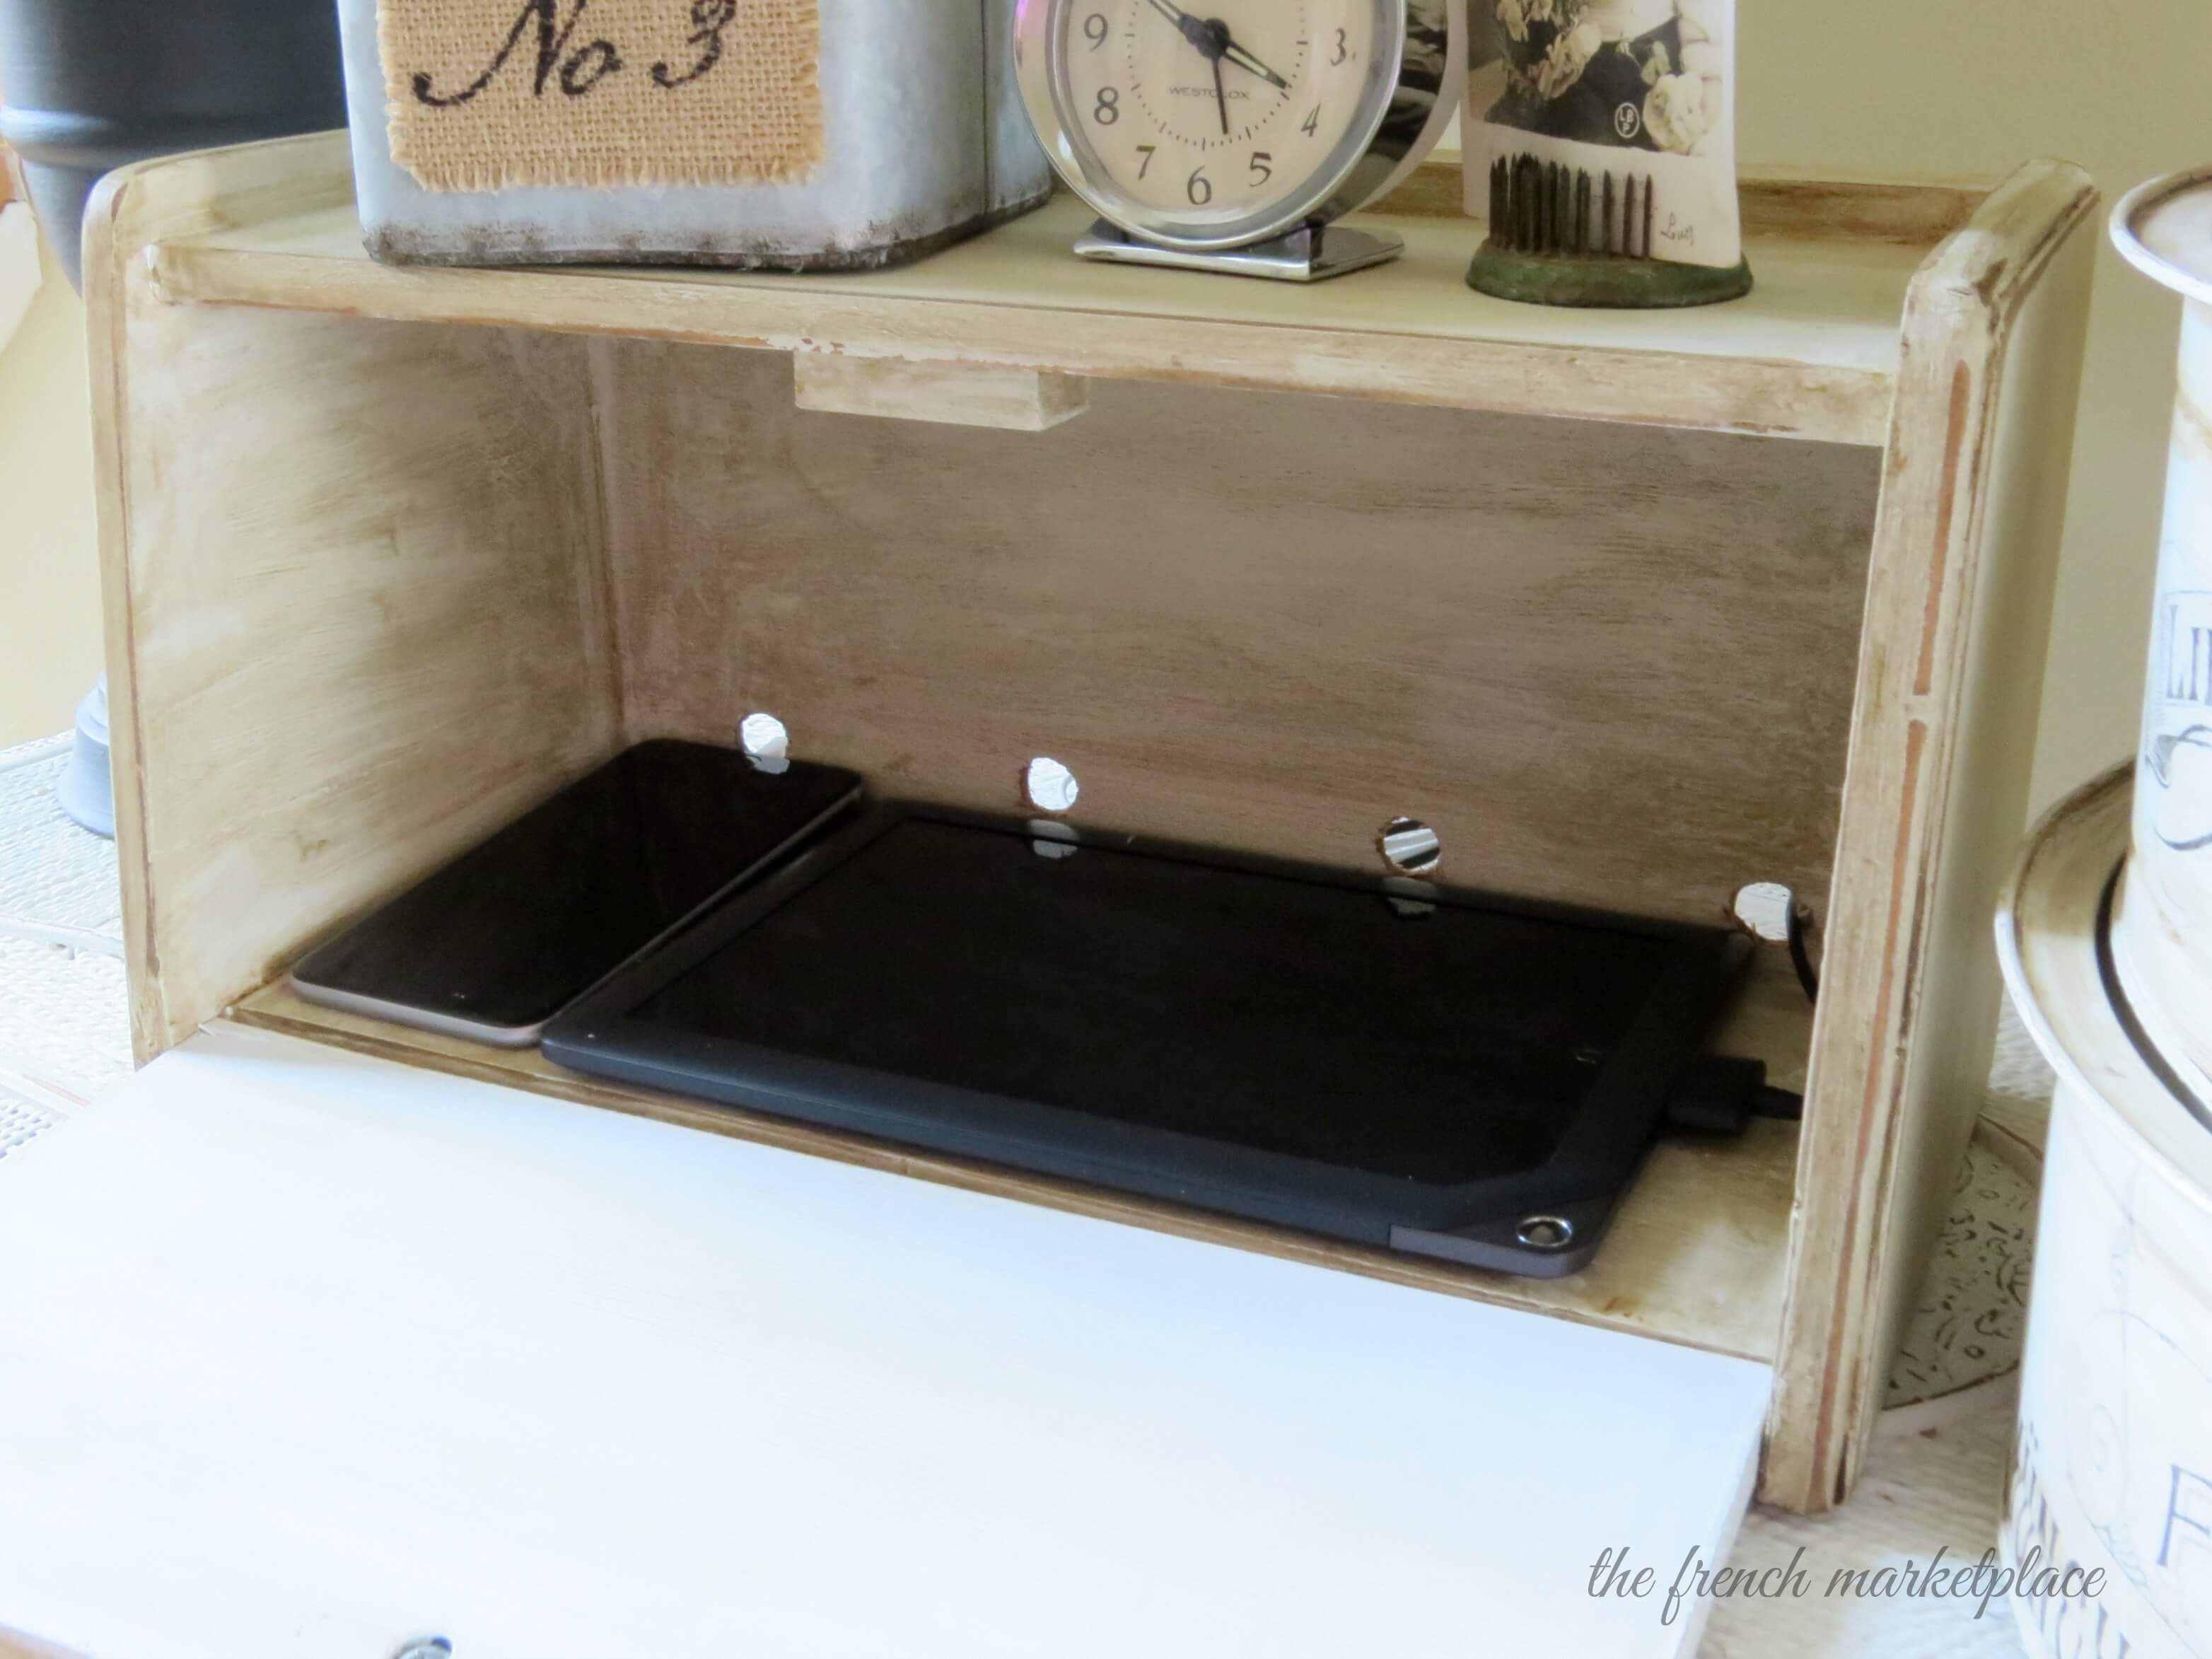
Here, my phone and my tablet fit nicely together. If I remove the tablet, our phones and ipod all fit together at once. Now close the breadbox and all of your electronics are hidden away!

And there you have it! A perfectly fun and functional charging station that you can customize to fit into your decor.

Now, go and have some fun out on the junkin’ trail while looking for the perfect breadbox to transform into your very own charging station! Until next time, Have a great day everyone!!
xo,
Kathleen
If you like this, you should also check out these posts for more upcycling and DIY home decor ideas:
Learn how to transform your old home decor accessories with a Shabby Chateau Finish
Learn how to make your old dining room chairs gorgeous with this DIY Seat Cushion Tutorial
Make a cheap plastic planter look like a high-end French Clay Pot
And if you’re in the holiday spirit, learn how to make easy, adorable Christmas Ornaments
 ×
×
